How to Repair Curtains: DIY Fixes for Common Issues
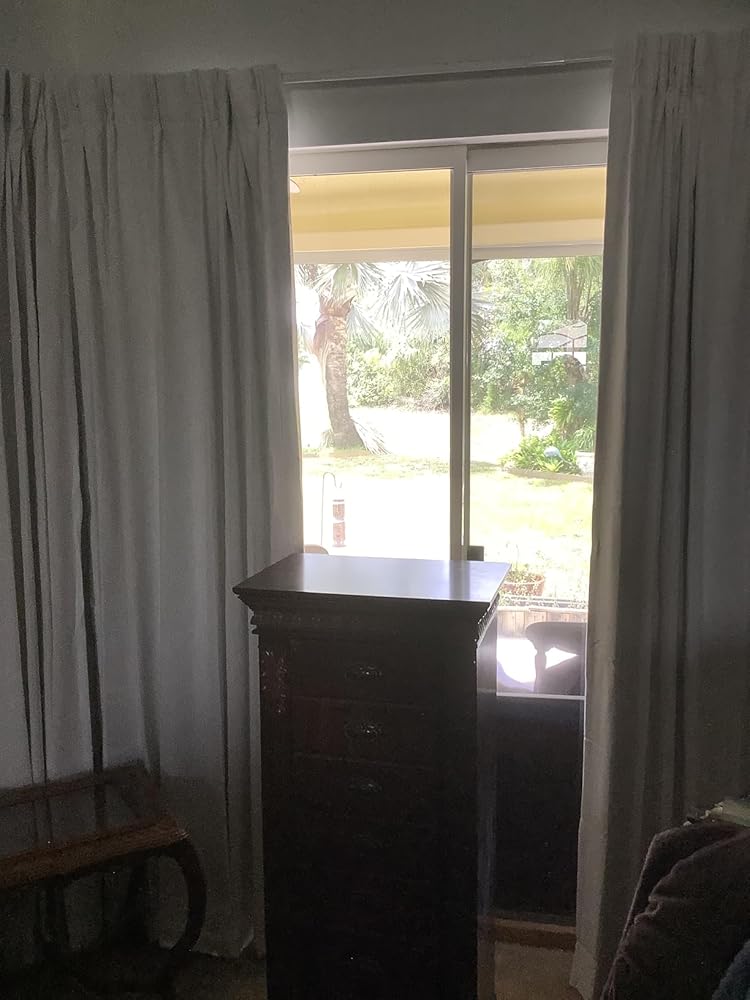
Last Tuesday, Lena pulled her bedroom curtains open before work and watched the rod tear out of the wall. Ten minutes later, she was staring at a cracked bracket, a sagging panel, and a drywall hole big enough to kill her morning.
If that scene feels familiar, this guide is for you. Knowing how to repair curtains can save money, protect privacy, and buy you time before you replace anything. In the next few minutes, you'll learn how to diagnose the real problem, fix the most common fabric and hardware failures, and decide when a repair is smart versus when replacement is the better move.
How to Repair Curtains: Start With a 5-Minute Diagnosis
Most curtain problems look bigger than they are. A dragging hem might be a length issue. A torn header might actually be a hardware mismatch. A panel that feels "worn out" may only need pressing, washing, or a stronger rod.
Before you reach for thread, tape, or anchors, ask three quick questions:
- Is the problem in the fabric, the header, or the hardware?
- Is this a visible cosmetic issue or a daily-use issue that affects privacy, light control, or safety?
- Will the fix last, or am I patching a curtain that is already at the end of its life?
Use this quick diagnosis table to speed up the decision.
| Symptom | Likely cause | Best first fix |
|---|---|---|
| Hem is loose or dragging | Stitches failed or panel was too long | Re-hem with iron-on tape or sew a new hem |
| Small rip near edge | Seam stress or pet snag | Patch from the back and resew the seam |
| Top of curtain is tearing | Hooks, rings, tabs, or rod pocket under strain | Reinforce header area and check hardware style |
| Curtain will not slide smoothly | Rough rod, bad rings, trim interference | Clean rod, swap rings, check bracket alignment |
| Rod bracket pulled out of wall | Weak anchors or heavy curtains | Re-anchor into studs or use stronger anchors |
| Curtains look too short | Shrinkage, wrong measurement, or rod height | Lower rod if possible or add fabric trim/band |
| Light leaks at edges | Curtain too narrow or mounted too low | Adjust width, fullness, or replace with better-fit panels |
| Musty smell or mildew spots | Moisture problem in room | Clean if light, replace if damage is deep |
Your repair kit does not need to be fancy. For most DIY curtain repair jobs, you only need a tape measure, straight pins or clips, matching thread, fabric scissors, iron-on hem tape, a hand needle, a screwdriver, wall anchors, a level, and a vacuum or lint roller.

Need to confirm whether the problem is really fit, not damage? Start with NICETOWN's measurement guide before patching a panel that was the wrong size from day one.
How to Repair Curtains With Fabric Damage
Fabric problems usually fall into three groups: ripped seams, failed hems, and distorted shape after washing or sun exposure. The fix depends on where the stress is happening.
Repair a torn seam or small rip
If the fabric tore at a side seam or along the bottom edge, resist the urge to stitch straight through the damaged area without support. That often makes the hole bigger the next time the panel is pulled.
Instead, do this:
- Trim loose threads without widening the tear.
- Lay the curtain flat and align the fabric so the tear closes naturally.
- Press a lightweight fusible patch or a small piece of iron-on interfacing on the back.
- Sew a narrow line just outside the damaged area, either by hand or machine.
- Press again so the repair lies flat.
This method works best for small tears on cotton blends, faux linen, and similar medium-weight fabrics. If the fabric is brittle, badly faded, or shredding around the rip, skip the patch. That curtain is telling you the fibers are failing, not just the seam.
Ana learned that the hard way before her parents visited for Thanksgiving. Her dining room panel had a two-inch tear near the hem after her dog caught a nail in it. She almost replaced the whole set. Instead, she added a fusible patch behind the tear, stitched the seam closed, and steamed the panel. The fix held through the holiday dinner and another six months of daily use because the surrounding fabric was still healthy.
Re-hem curtains that are dragging or coming loose
Loose hems are one of the easiest curtain repair jobs to tackle. If the old stitching is failing but the fabric still looks good, a clean new hem can make the panel look fresh again.

For a fast no-sew fix:
- Remove the curtain and iron the bottom edge flat.
- Measure the finished length you want.
- Fold the hem evenly across the panel.
- Insert iron-on hem tape inside the fold.
- Press in sections, using the heat setting that matches the fabric.
For a longer-lasting fix, sew a straight stitch across the new fold after pressing it into place.
If the curtains are dragging because the rod was installed too low, fix that first. Re-hemming a panel that was measured incorrectly only locks the mistake in. NICETOWN's post on how to install curtain rods is a useful follow-up if the hardware placement is the real issue.
What to do if curtains shrank or hang unevenly
Curtains that suddenly look short often shrank in the wash or were dried too hot. If the loss is minor, you can sometimes recover the look by lowering the rod slightly, letting out the hem, or adding a trim band at the bottom.
If only one panel looks short, compare all of these before you change the fabric:
- Is one bracket lower than the other?
- Is one panel clipped or hooked differently?
- Is the floor uneven?
- Did one curtain go through a hotter wash cycle?
When the fix becomes decorative rather than invisible, be honest about it. A trim band can look intentional in a casual room. It doesn't usually look right in a formal living room with long, tailored drapes.
How to Repair Curtains When the Hardware Fails
Some of the most frustrating curtain problems are not sewing problems at all. They are hardware problems wearing a fabric disguise.
Reattach hooks, rings, tabs, or stressed header areas
If the top of the curtain is tearing, look closely at the point of strain. Is the damage in the rod pocket? Around clip rings? At the hook tape? Near the back tabs? The right repair depends on where the force is concentrated.

Use these fixes by header type:
- Rod pocket: Stitch a reinforcement strip behind the worn pocket area.
- Clip rings: Move clips away from the torn spot and back the area with interfacing.
- Hooks or pleat tape: Replace missing hooks and resew loose tape before the tear spreads.
- Back tabs: Restitch each tab at its base, not just the loose edge.
If the fabric keeps tearing where it meets the hardware, the setup may be wrong for the curtain's weight. Heavy blackout panels need support. Thin clip rings on a heavy panel create stress quickly. That's when "repair curtain hooks" turns into "replace the hanging system."
If your hardware is the weak link, browse sturdier curtain rods and accessories before you keep repairing the same stress point every month.
Fix curtains that will not slide smoothly
When curtains stick, bunch, or catch on trim, daily use gets annoying fast. This is a simple problem, but it often gets ignored until the fabric starts tearing from all that tugging.
Work through these checks in order:
- Remove dust from the rod, rings, and header.
- Confirm both brackets are level.
- Check whether the curtain is rubbing a wall return, molding, or window latch.
- Replace rough or undersized rings.
- Add a center support if the rod is bowing.
Marcus ran into this in February when his bay-window curtains started jerking to a stop every morning. He thought the fabric had stiffened from winter dryness. The real issue was simpler: one bracket had shifted forward, and the back edge of each ring was catching on the trim. Ten minutes with a screwdriver fixed a daily irritation that had been slowly stressing the header for months.
Repair a curtain rod or bracket that pulled out of the wall
This is the repair homeowners dread because it feels like wall repair, not curtain repair. But it is common, especially with heavier panels and weak drywall anchors.

If a bracket ripped out:
- Take down the curtain and rod.
- Check whether you can move the bracket slightly and hit a stud.
- If not, patch the damaged hole and use a better anchor rated for the load.
- Reinstall the bracket level with the opposite side.
- Add a center bracket for wide windows or heavier drapes.
Do not hang the panel back up until the anchor is fully secure. A rushed reinstall is how you end up with a bigger drywall failure the next week.
This is also where safety matters. If your window treatment uses cords or loops, keep them out of reach of children.
The U.S. Consumer Product Safety Commission says about nine children under age five die each year from strangling in corded window coverings, and nearly half of reported incidents from 2009 to 2021 were fatal. If your repair involves old corded hardware, replacement is often the smarter decision. Read the CPSC warning here.
If you need a sturdier replacement setup, NICETOWN's wooden curtain rods and broader window treatment hardware are the logical next stop.
How to Repair Curtains That Lost Performance or Appearance
Some curtains are technically intact but no longer doing their job. They fade, wrinkle, smell musty, or stop blocking light as well as they used to. When people search how to repair curtains, they often mean these slower performance problems too.
Fix wrinkles, poor drape, and mild fading
Start with the least invasive fix first:
- Steam or iron the curtain using the correct fabric setting
- Vacuum dust from the face and header
- Spot clean marks before washing the full panel
- Rotate sun-exposed panels when possible
This matters more than appearance alone. According to the U.S. Department of Energy, conventional draperies can reduce heat loss from a warm room by up to 10% when drawn in cold weather, and medium-colored draperies with white plastic backings can reduce heat gain by 33%.
If a thermal or blackout curtain is still structurally sound, repair and maintenance can preserve real comfort value, not just looks. See the DOE guidance here.
What if the curtain is deeply sun-faded, especially along the fold lines and leading edge? That usually means the fibers are breaking down. You can press it, clean it, and patch small spots, but you cannot restore strength or color evenly. That is a replacement conversation, not a repair conversation.
Clean mildew carefully, and know when to stop
If the curtain smells musty or has a few small mildew spots, address the room's moisture source before you clean the fabric. Otherwise, the problem comes right back.
Light mildew can often be treated if the care instructions allow it. Deep staining, repeated odor, or visible fiber damage usually means the curtain should go.
Keep these rules in mind:
- Dry the room and the fabric fully before rehanging
- Use the gentlest cleaning method the fabric allows
- Do not reinstall curtains against a damp window frame
- Replace the panel if mold has spread through the lining or backing
The EPA's mold guidance recommends controlling moisture first and keeping indoor humidity in a safer range. That advice matters here because curtain mildew is usually a room problem before it becomes a fabric problem. Read the EPA moisture-control infographic here.
There is also a broader sustainability angle. EPA data shows textiles made up 17 million tons of municipal solid waste in 2018, or 5.8% of the total stream. Smart repair is worth doing when the curtain is still sound. Dragging a dry-rotted panel through one more season is not. The textile data is available here.
Repair or Replace? Use This Simple Filter
When homeowners get stuck, it's usually because they are asking the wrong question. The question is not "Can I fix this?" The better question is "Will this repair solve the actual problem for the next six to twelve months?"
Answer these five questions:
- Is the fabric still strong where you are repairing it?
- Does the curtain still fit the window correctly?
- Does it still provide the privacy, blackout, or thermal performance you need?
- Is the hardware strong enough for the panel's weight?
- Will the repair cost less time and frustration than replacement?
If you answered "no" to two or more, replacement is usually the cleaner decision.
Maya hit that point in her nursery last fall. One panel had faded on the sun side, the hem kept twisting, and the curtain was no longer blocking early morning light. She could have kept patching it. Instead, she switched to better-fitting blackout curtains and stopped fighting the same three problems at once. That was not giving up on curtain repair. It was recognizing that the real issue was performance loss, not one broken seam.
Here is a practical rule of thumb:
- Repair when the damage is local and the curtain still fits and performs well
- Replace hardware when the rod, rings, or anchors are causing repeat damage
- Replace the curtain when the fabric is weakened, the fit is wrong, or the room needs a different performance level
If fit is the real problem, look at custom curtains instead of spending another weekend forcing standard panels to work. If you are unsure about fabric or color before replacing, order curtain swatches first.
Common Questions About Curtain Repair
Can you repair torn curtains without sewing?
Yes, for small tears and loose hems. Iron-on hem tape or fusible interfacing can handle minor damage. For stress points near hooks, tabs, or rod pockets, sewing is more reliable.
How do you fix a curtain rod that ripped out of the wall?
Take the rod down, patch the damaged hole if needed, and reinstall with a stronger anchor or into a stud. If the curtain is heavy or the span is wide, add a center support bracket.
What is the best way to fix curtains that are too short?
First, confirm whether the rod is too high. If the panel truly shrank or was bought short, your options are letting out the hem, adding a decorative band, or replacing the curtain with the right length.
When should you stop repairing curtains?
Stop when the surrounding fabric is brittle, the lining is failing, the curtain no longer delivers privacy or blackout performance, or the same hardware problem keeps damaging new repair spots.
The Bottom Line
Most curtain repairs fall into a handful of predictable categories: torn seams, failed hems, stressed headers, rough hardware, and fit problems that look like damage. Diagnose first. Fix the real cause second. Replace only when the fabric, fit, or performance is already too far gone.
If you want the shortest path forward, start here:
- Measure before you patch: use NICETOWN's curtain measuring guide
- Fix the support system: review how to install curtain rods or shop curtain hardware
- Replace smarter when needed: explore custom curtains, blackout curtains, or fabric swatches
That way, you're not just learning how to repair curtains. You're making sure the next fix actually lasts.
Before You Go…
Here are a few handpicked articles to inspire your next self-care moment.